AquaMon® Installation Guide |
Installation Guide for AquaMon Pump Control Node - May 21, 2015 |
INTRODUCTION
The AquaMon pump Control Node permits the grower to monitor line pressures and control irrigation pumps through the RSVP software running on Cermetek’s secure web server. The grower can access the server at any time using any browser equipped, laptop, tablet, smart phone or desktop computer. Communications between the Pump Control Node and the Cermetek secure web server is maintained by an internally integrated GSM/GPRS cellular modem module. The GSM modem moves data from the pressure sensors to the web server and receives pump control commands from the web server to activate and deactivate irrigation pumps connected via latching solenoids, |
RSVP Web Host |
| AQUAMON PUMP CONTROL NODE INSTALLATION |
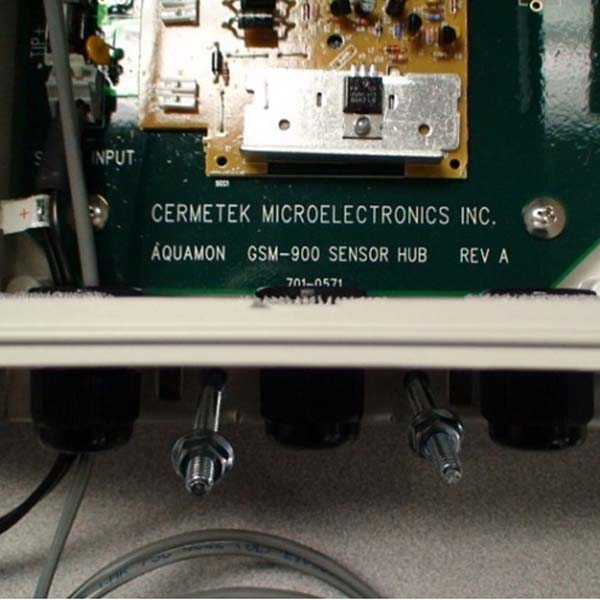
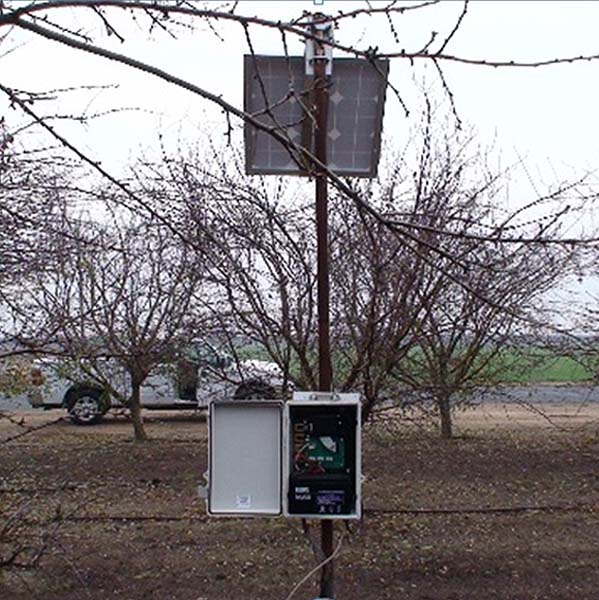
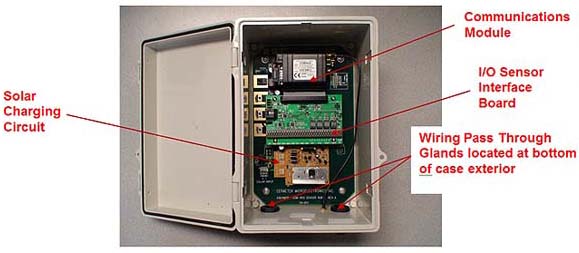
The picture figure below shows the hardware components installed in the pump control node. Installation of the Base Station requires physical connection of the node and solar panel to the user supplied pole using the hardware mounting brackets are supplied by Cermetek. The wiring for the pressure sensors and the latching solenoids must be run through the glands provided at the bottom of the case Internet Registration is automatic once power is provided to the Base Station.
HARDWARE Installation PROCEDURE {INSTALLATION NOTE} |
|
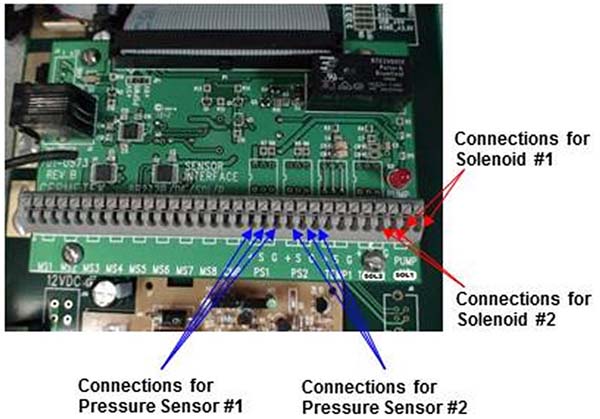
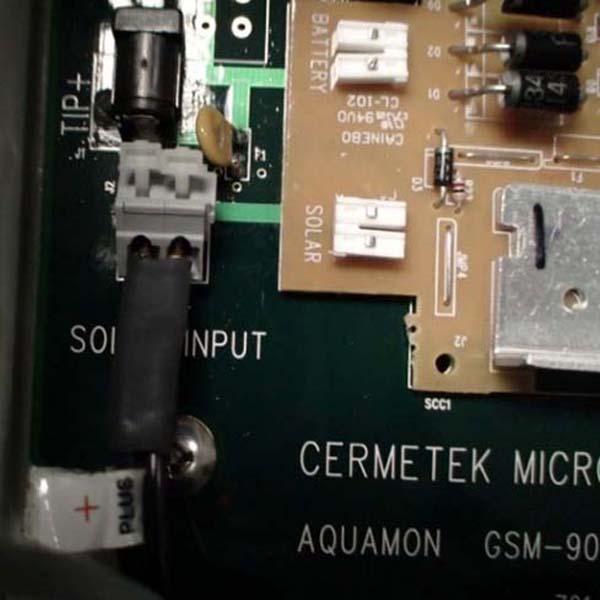
* The USER SUPPLIED sensors and solenoids are connected to the pump control node using separate terminals and dedicated connectors located inside the Base Station enclosure. |
| Installing the Pressure Sensor Connections Steps 3-8 below show how to make the electrical connections... |
|
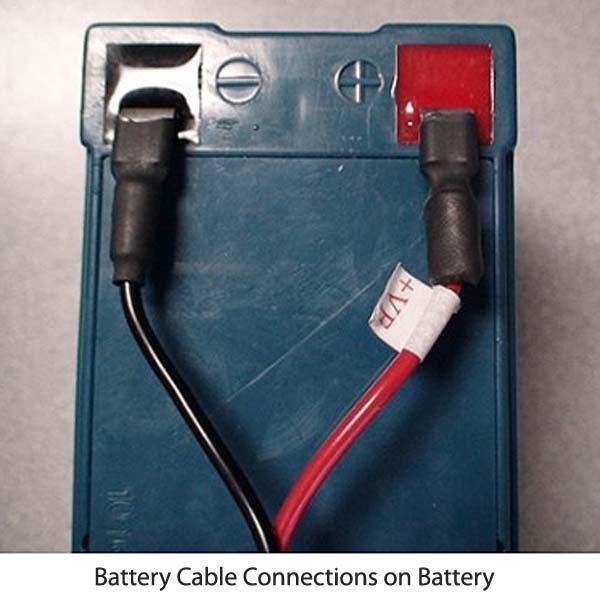
Installing the Battery and Solar Panel |
|
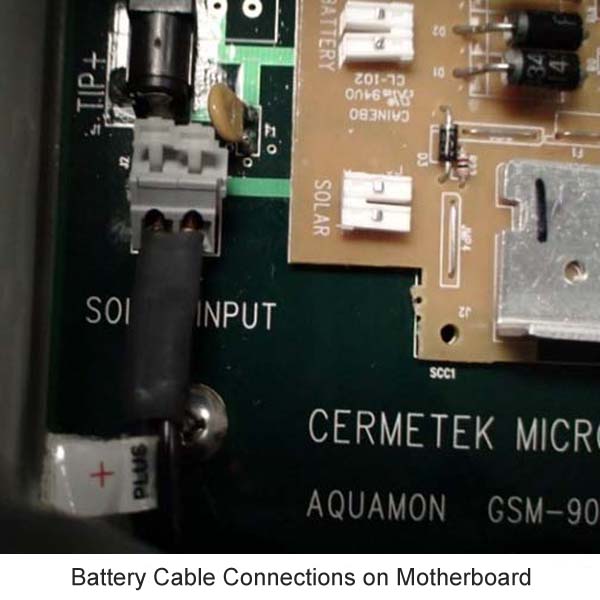
Battery Cable Connection on Mother Board {SAFETY WARNING} |
|
| RSVP SOFTWARE LOGIN |
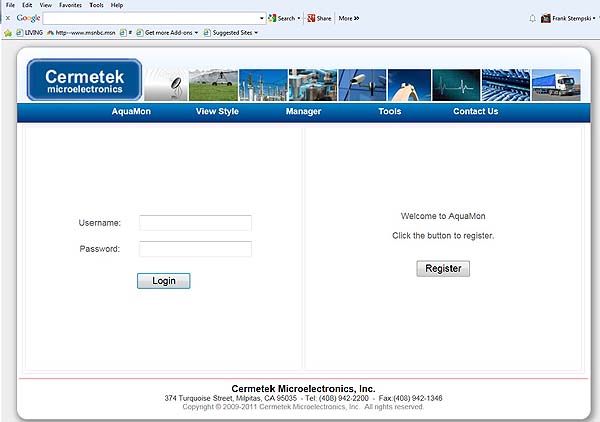
The Remote Sensor Viewing Platform (RSVP) Software is used to access Cermetek’s Web Based device control, sensor monitoring and data display and archival network. The RSVP software is a web based application. It is accessed from any PC or MAC hardware platform running a commercially supplied web browser. No installation is required. However, a subscription to Cermetek’s Web Based Data Hosting Services is required for access. Cermetek will provide the user with an initial Login USERNAME and PASSWORD. The user may change the PASSWORD at any time once the user has successfully logged onto the RSVP web site. Follow the step-by-step procedure below to access the RSVP Web site from any browser equipped tablet, smart phone or computer.
|
| USING THE DISPLAY SOFTWARE |
Image of the RSVP Web Site Login Page
|
| INDEMNIFICATION Clause |
The purchaser/installer/user of the CHB5000AGWL System Installation Guide: Wireless Monitoring Network containing a GSM RF Cell Radio, Water Level Monitor and AC/DC Power Supply product and the RSVP Web Site agrees to indemnify, defend, and hold harmless Cermetek Microelectronics, INC, its affiliate and their respective owners, investors, contractors, officers, directors, members, managers, partners, shareholders, licensors, suppliers, customers, employees, agents, third-party advertisers, technology providers and service providers from and against any loss, damage, cost, or liability (including reasonable attorneys' fees) resulting from or relating in any way to a third-party claim, demand, action or proceeding that arises out of the installation or use of CHB5000AGWL product, including but not limited to in relation to your use, non-use or misuse of, or connection to the CHB5000AGWL product, the RSVP Software Services and any Content (including without limitation your Content and any third party Content) forming part of the RSVP site. Cermetek reserves the right to make changes in specifications at any time and without notice. The information furnished by Cermetek in this publication is believed to be accurate and reliable. However, Cermetek assumes no responsibility for its use, or for any infringements of patents or other rights of third parties resulting from its use. No license is granted under any patents or patent rights of Cermetek. |
 The pump control node simultaneously communicates with the Internet via an established cell.